Thursday, 30 August 2012

Something about Swedes


Well as some of you know a few months back we planted various winter crops in the top paddock – Swedes included. The crop seemed to tick along ok, plenty of lush bush on top, but not much below.
So making way for spuds, they all came out over the weekend. Our hearts sank when the bulk of the plants where undersized. Considering they were in for a over 3 months, this is not a good sign.
Anyhow, over to the kitchen they go. Hot pot – camp oven style – was on the menu so a perfect match with other root vegetables. Ahhh, brown some beef off, add some onions and stock, keep on the bed of coals for a while, add the vege and herbs. Pop the lid back on and keep it simmering away for another hour or so, then in with some dumplings. Smells great, looks great....


So are you drooling over this yet? As I was saying, smells and looks delish... and seeing those home grown swedes among the mix make us feel proud. However, as we begin to eat, we soon realise that swedes suck! Actually they taste like crap in here! A few lessons learned from this - the top paddock needs attention and is definitely lacking in something (to investigate) and secondly... GROW WHAT YOU LOVE TO EAT! 

Sunday, 26 August 2012

Weekend Helpers


There is a change in air – beautiful spring days have emerged and it has been a productive weekend in the garden.

As ever, the kids were keen to help and at one stage the garden was getting quite crowded (with the cat even coming in for an investigative peek).

Stepping pavers purposely placed between rows makes it easy for them to jump around and get within the plants. Don’t get me wrong, I’m as nervous as hell when they get the wobbles and a foot goes astray – but they are learning – and so am I, to chill out a bit.

We also have a colander on hand so they can easy hold the harvest. But honestly, just having them close by, watching us and maybe helping out a little bit … well that is just priceless!


Thursday, 23 August 2012

Reliable Carrots

The ol' broccolini crop is now over and out - we have had some awesome feeds from this crop but has tapered off a good deal now so out she comes and some carrots go in. You can see the chooks drooling over these lush green leaves of the ex-broccolini and no doubt within a few days they would of reduced the plant down to just a bare stem!

There has been a bit of discussion in our house over the humble carrot and its value. Sometimes buying a bag in the supermarket seems so easy and cheap. But they would have to be one of the easiest and most successful vege that we've tried to grow. Plus it is one of the favourite things the kids like to yank out of the garden! 

freshly yanked carrots - the tops will go straight the chooks

I've tossed a bit of compost in the area plus a bit of chook poo and drag a few good lines through the dirt, in no fixed fashion and sprinkle the seed, don’t spare the seed - we will thin it out a bit later. Remember only just cover the seed with soil, 3mm coverage ain’t much, and this is how much you need!

Keep seeds a bit moist until they emerge – about 3 weeks for the carrot (in warmer weather about 10 days). When you cover the seed I always grab a handful of soil from next to the rows and rub it through my fingers to make it really fine as it’s falling onto the seeds, so I don’t smother them with big bits.

And remember, successive planting is pretty important on this all rounder - another planting will go down in about 2-3 weeks!

current seeds from these guys -
but not always this brand

Sunday, 12 August 2012

Spud Time


Yep check out the pic of my “ex Broccoli crop” from the top paddock - well in this part of the garden it never really came off cos’ some stinking rabbit, or hare kept eating the tops off and all the leaves...


So, plowing it in and planting some spuds cos, the time is right,. There should only be a few frosts left and definitely by the time the plant emerges anyhow (That’s my farmers risk for the season; all big time farmers like me have to take risks right?).

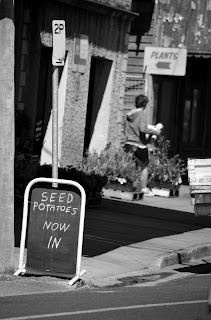
For local crew get your “seed potatoes” from Sauers garden centre opposite the rattler – 2 kg for $5.50. Some are quite big with a few sprout points (the white 'eyes'), so I have sliced them in half. Make sure there is at least one sprout point per piece. I will leave them for a couple of weeks so the cut side seals over and the spuds sprout a bit more.


To prepare the soil, cultivate until friable - do it pretty deep like couple of hand-spans and then drag yourself a good trench through for planting. At the bottom of the trench lay a good bed of fertiliser (organic stuff like KATEC Dynamic lifter) then drag a few inches of soil over this then throw your potatoes along the trench a bit more than 1 foot apart ~ 40cm with the 'eyes' facing up. Cover them all up with soil back to ground level and wait a few weeks and they’ll be up! We should at least double, if not triple our crop!

As they grow I will need to hill the soil around them, keeping a good pile of soil covering the spuds as they don't ever want to see the light. I'll let you know the progress!

Thursday, 9 August 2012

New Outlook

With the wet weather hanging about recently, I'm finding it hard to 'lounge around' on the grass without getting my rear-end satched. A friend off loaded some ol' sleepers to us a while back and while most of them came in handy to create edging for our first garden, there is still a few lying around. Got me thinking about having a new place to park up and ponder the garden...


A good pressure clean cleared out the ants and dirt...


In the end, I didn't even give the sleeper a sand as the natural ridges feel nice to sit on. A couple of solid iron-bark stumps from the wood heap became ideal legs...

Cat gives the seal of approval


I actually surprised myself on how easy this project was. No glueing or screwing - the damn hardwood sleeper and logs are so heavy, there is no budging them.


So now, we have a new outlook on the garden and lawn, without the wet backside!

Monday, 6 August 2012

Hot Orange Beetroot

The afternoon roles around and once again I am faced with the 'what's for dinner' scenario... With a few beets picked the day before and some oranges still remaining on the tree... what can I whip up?


A recipe was sought and this strange combo turned out remarkably well! Even our 4yo shared in the glossy red citrus delight. 7yo showed no interest - but that is typical - he doesn't tend to try anything that is brightly coloured (except icing on your typical birthday cakes).


1. Cut stalks from a few medium sized beetroot. Place in a saucepan with a cup of fresh orange juice, bring to the boil then cover tightly and simmer for about 40 minutes. Remove beetroot, cool slightly and slip skins off (they come off really easy - don't forget to feed these to the chickens or add to your compost).

2. Half or quarter the beets and add back into the saucepan with juice. Add 2 tablespoons of wine vinegar, 1  teaspoon of brown sugar and cook for a minute.

3. Combine 2 teaspoons of cornflour with 2 tablespoons of extra orange juice and add to the beetroot, stirring constantly until the mixture thickens.


It went fabulously with our lamb casserole and mash potato. This vege is fast becoming one of my favourites. Now, where was that chocolate beetroot cake recipe... 7yo is bound to try that!